The best kits for growing nutrient packed microgreens at home – The best kits for growing nutrient-packed microgreens at home offer a fantastic way to add vibrant, nutritious greens to your diet. This guide dives deep into the world of microgreen gardening, exploring various kits, their pros and cons, and essential growing techniques. We’ll uncover the secrets to nurturing these tiny powerhouses, from seed selection to harvesting and beyond.
This comprehensive resource will cover everything you need to know to successfully cultivate nutrient-rich microgreens at home, regardless of your experience level. We’ll discuss different types of kits, from simple trays to advanced hydroponic systems, comparing their features and effectiveness. The information is tailored to help you make the best choice for your space, budget, and growing goals.
Introduction to Microgreens
Microgreens are the young, tender shoots of various vegetables and herbs, harvested just after the cotyledon leaves (seed leaves) have unfolded. They pack a significant nutritional punch, boasting higher concentrations of vitamins, minerals, and antioxidants compared to their mature counterparts. This makes them a valuable addition to a healthy diet, offering a concentrated dose of nutrients in a small package.Growing microgreens at home offers numerous advantages.
It allows for fresh, pesticide-free produce, control over growing conditions, and a rewarding experience in cultivating your own food. This hands-on approach to gardening fosters a connection to nature and provides an opportunity to experiment with different varieties and flavor profiles. It also reduces the environmental impact associated with transporting produce from distant farms.
Microgreens vs. Sprouts
While both microgreens and sprouts are young plant shoots, they differ significantly in their growth stage and nutritional content. Sprouts are the early stages of a plant’s development, typically involving only the seed’s cotyledon leaves. Microgreens, on the other hand, develop true leaves after the cotyledon leaves, leading to a more complex nutritional profile. Essentially, microgreens represent a more advanced stage of growth, with a higher concentration of nutrients.
A Brief History of Microgreens
The exact origins of microgreens are not definitively known, but their use in various culinary and medicinal traditions spans centuries. Records suggest that various cultures have historically utilized the young shoots of vegetables and herbs for their nutritional and flavor properties. However, modern cultivation techniques and the widespread recognition of their nutritional value have led to their recent popularity as a health food.
In the 21st century, microgreens have become a staple in restaurants, grocery stores, and home gardens, recognized as a significant source of vitamins, minerals, and antioxidants.
Microgreen Nutritional Value
Microgreens are a valuable source of vitamins, minerals, and antioxidants. They contain high concentrations of vitamins like vitamin C, vitamin K, and various B vitamins. They also offer minerals like calcium, iron, and potassium. Their high nutrient density makes them a nutritious addition to any diet, especially for those seeking to increase their intake of essential vitamins and minerals.
Microgreen Varieties and Growth Times
| Microgreen Type | Nutritional Value | Growing Time (Days) |
|---|---|---|
| Broccoli | High in vitamin C, fiber, and minerals | 7-10 |
| Spinach | Excellent source of vitamins A, C, and K | 7-10 |
| Kale | Rich in vitamins A, C, K, and minerals like calcium | 7-10 |
| Pea shoots | High in protein and vitamins | 7-10 |
| Carrot | Rich in beta-carotene, vitamin A, and fiber | 10-14 |
| Radish | Good source of vitamins and minerals | 7-10 |
Essential Growing Kits
Choosing the right microgreens kit is crucial for success. A well-designed kit streamlines the process, ensuring optimal growing conditions and maximizing yield. This section delves into the various types of kits available, their advantages and disadvantages, and the key components to look for when selecting a high-quality option. It also provides insight into building a custom setup, equipping you with the knowledge to tailor the process to your specific needs.Different types of microgreens kits cater to diverse needs and budgets.
The options range from simple trays to more complex hydroponic systems. Understanding the characteristics of each type is vital for selecting the best solution for your home-growing journey.
Types of Home Microgreen Growing Kits
Home microgreen growing kits vary significantly in design and functionality. These differences impact the ease of use, space requirements, and potential yields. The most common types include seed trays, jars, and hydroponic systems.
- Seed Trays: These kits typically consist of shallow trays with multiple compartments or wells for seeds. They are often inexpensive and relatively easy to use, making them popular for beginners. Seed trays can accommodate a significant number of seeds, providing ample yield for personal use or small-scale sales. They often require careful watering and monitoring to maintain even moisture levels throughout the growing process.
- Jars: Jars, often with lids, offer a compact and controlled environment. These kits are suitable for smaller spaces and often include a growing medium, making setup quick and straightforward. Their enclosed nature can help maintain humidity, although it also necessitates careful monitoring to prevent overwatering. The smaller scale of these systems can be ideal for those seeking a manageable starting point.
- Hydroponic Systems: These advanced systems provide a soilless environment for seed germination and growth. Hydroponic kits often involve a nutrient solution, which is delivered to the roots directly. This can lead to faster growth rates and higher yields, although the setup and maintenance are more complex compared to other systems. Hydroponic kits can be expensive but potentially rewarding for those seeking maximum efficiency and control over the growing process.
Comparing Kit Pros and Cons
Different kits offer unique advantages and drawbacks. Considering these factors will help you choose the best option for your needs.
| Kit type | Price | Capacity | Ease of use |
|---|---|---|---|
| Seed Trays | Low | Medium | High |
| Jars | Medium | Low | Medium |
| Hydroponic Systems | High | High | Medium |
Crucial Components of a High-Quality Microgreen Kit
A high-quality microgreen kit ensures optimal growth and minimal hassle. The key elements include proper seed spacing, adequate drainage, and controlled moisture levels.
- Seed Spacing: Proper spacing prevents overcrowding, allowing each seedling to access adequate light and nutrients. This is crucial for achieving a healthy and uniform harvest.
- Drainage: Excellent drainage is essential to prevent waterlogging, which can lead to root rot and seed decay. Adequate drainage is a critical aspect of successful microgreens cultivation.
- Moisture Control: Maintaining consistent moisture levels is vital for healthy seed germination and seedling development. Moisture control mechanisms, like humidifiers or carefully regulated watering systems, contribute significantly to the overall success of the process.
Materials for a Custom Kit
Building a custom microgreen kit provides complete control over the growing environment. This includes flexibility in design and adaptability to various spaces.
- Trays or Containers: Choose trays or containers with adequate depth for seedling development and proper drainage.
- Growing Medium: Select a suitable growing medium that facilitates drainage and provides necessary aeration.
- Watering System: Implement a reliable watering system to ensure consistent moisture levels without overwatering.
- Lighting: Consider the light requirements of the chosen seeds. Proper lighting can significantly influence the growth and nutrient content of the microgreens.
Choosing the Right Kit
Picking the perfect microgreen kit depends on several factors, including your available space, budget, and experience level. A well-chosen kit ensures a successful harvest and enjoyable growing experience. Understanding the different types of growing environments and the crucial role of drainage and aeration is key to optimal microgreen growth. Customization options allow you to tailor the kit to your specific needs and preferences.
Factors to Consider When Selecting a Kit
Several important factors influence the best microgreen kit choice. Your space limitations, budget constraints, and experience level are crucial considerations. A compact kit is ideal for small spaces, while a larger model is better suited for more extensive growing projects. Budget-conscious individuals can find excellent value in entry-level kits, while those seeking advanced features and control may need to invest in higher-end options.
Beginners may prefer a simple, easy-to-use kit, while experienced growers may benefit from a kit offering more customization and control over growing conditions.
Finding the perfect microgreens kit for a nutrient-packed harvest at home is key, but for those needing to meticulously track their time, especially for efficient growing, exploring the best GPS time tracking software could also be a useful tool. A great option for managing your time and optimizing your microgreen growing process might involve using best GPS time tracking software to precisely log the time spent on various stages of your microgreen cultivation, ensuring the highest quality of nutrient-rich sprouts.
Ultimately, the best microgreen kits offer everything you need for easy and efficient growth, allowing you to enjoy the best possible results.
Different Growing Environments and Suitability, The best kits for growing nutrient packed microgreens at home
The environment in which you plan to grow your microgreens plays a significant role in choosing the right kit. Different growing environments have varying needs, and the kit should accommodate those requirements. Indoor growing, whether in a dedicated space or on a countertop, requires a kit that can maintain consistent temperature and humidity levels. Outdoor growing, such as on a balcony or patio, necessitates a kit that can protect the plants from harsh weather conditions.
The availability of sunlight and the ability to control the environment are key factors to consider. For example, a hydroponic kit might be best for indoor use due to its ability to provide precise water control and optimal growing conditions.
Importance of Drainage and Aeration
Proper drainage and aeration are vital for healthy microgreen growth. Poor drainage can lead to root rot and other fungal diseases. Sufficient aeration allows roots to absorb nutrients effectively and prevents the build-up of stagnant water, which can harm the plants. Microgreen kits should include features that facilitate proper drainage and aeration. Good drainage channels and air pockets in the growing medium are crucial for preventing waterlogging and ensuring healthy root development.
Customizing Your Chosen Kit
Customizing a microgreen kit can significantly enhance your growing experience. For example, you can add grow lights to extend the growing season and control the light spectrum for optimal microgreen development. Adjusting the growing medium or adding additional containers for different varieties can also be beneficial. Supplementing with nutrients and adjusting watering schedules according to your specific needs will maximize your yields.
These customizations can adapt the kit to your unique needs and preferences.
Table: Growing Environments and Best-Suited Kits
| Environment | Kit Type | Considerations |
|---|---|---|
| Indoor (dedicated space) | Hydroponic or Aeroponic Kit | Precise control over temperature, humidity, and light; potential for higher yields. |
| Indoor (countertop) | Compact Seedling Tray or Vertical Farm Kit | Space-saving design; suitable for smaller spaces; may require supplemental lighting. |
| Outdoor (balcony/patio) | Elevated Garden Bed or Self-Watering Kit | Protection from harsh weather; consideration of sunlight availability; potentially needs more space. |
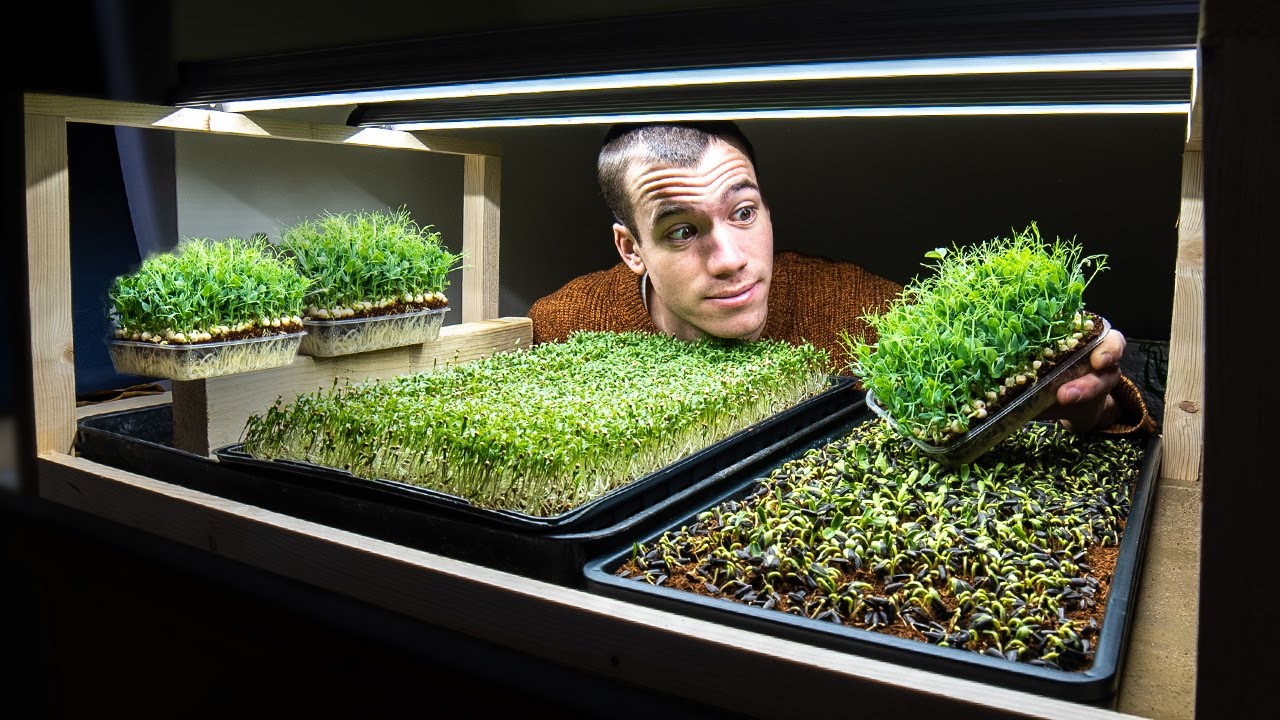
Growing Microgreens with the Best Kits
Transforming your kitchen into a microgreen haven is easier than you think, especially with the right equipment. Choosing a suitable kit is the first step to success, but understanding the specifics of seed preparation, moisture management, and environmental control is crucial for achieving optimal growth. These factors, when carefully considered, will help you cultivate vibrant, nutritious microgreens at home.
Looking for the best microgreens kits to boost your home garden’s nutrient density? These kits offer a fantastic way to grow nutrient-packed microgreens easily. Knowing the best tools for the job is key, but also consider exploring top JavaScript animation libraries for visually engaging presentation of your harvest. Top JavaScript animation libraries can elevate the visual appeal of your microgreens journey, making your home garden even more appealing.
Ultimately, the best microgreens kits are those that perfectly fit your needs and gardening style.
Preparing the Chosen Kit
Proper kit preparation sets the stage for successful microgreens. Thoroughly clean all components, including the growing tray, seed starting mat, and any included containers. Rinse with warm soapy water, then thoroughly rinse with clean water to remove any residue. Ensure all parts are completely dry before adding seeds and growing medium. This prevents potential contamination and promotes healthy growth.
Seed Selection and Preparation
Seed selection and preparation are key to robust microgreens. Choose fresh, high-quality seeds from a reputable source. Look for seeds that are free from damage or signs of mold. Soaking seeds before planting can significantly accelerate germination. Place seeds in a bowl of lukewarm water and let them soak for 4-6 hours, or as directed by the seed package.
This process softens the seed coat, enabling faster water absorption and germination.
Maintaining Consistent Moisture
Consistent moisture is essential for healthy microgreen development. Maintaining the right moisture level is crucial, neither too wet nor too dry. The growing medium should feel consistently moist, like a damp sponge, but not waterlogged. Overwatering can lead to root rot, while underwatering can stunt growth. A reliable method for monitoring moisture is to touch the growing medium periodically.
Temperature and Light Conditions
Temperature and light conditions significantly impact microgreen growth. Microgreens generally thrive in temperatures between 65-75°F (18-24°C). Avoid placing your kit in direct sunlight, as this can lead to scorching. Ensure adequate light for the chosen kit, as this will help the plants grow straight and healthy. Most kits come with supplemental lighting for optimal growth.
Growing Schedule
This table Artikels a general schedule for growing microgreens. Adjust times based on your specific kit and environmental conditions.
| Stage | Action | Time |
|---|---|---|
| Seed Preparation | Soak seeds in lukewarm water | 4-6 hours |
| Kit Preparation | Clean and dry all kit components | 15-30 minutes |
| Seeding | Place soaked seeds in the growing medium | 15 minutes |
| First Sprout | Monitor moisture, maintain optimal temperature | 2-3 days |
| Growth | Provide consistent moisture, light, and temperature | 3-10 days (varies by variety) |
| Harvesting | Harvest when microgreens reach desired size | As needed |
Maintaining Optimal Conditions
Nurturing microgreens to their full potential requires careful attention to environmental factors. Proper light, water, and humidity are crucial for achieving vibrant, healthy growth and maximizing nutrient density. Understanding the specific needs of different microgreen varieties is key to success.Optimal growing conditions mimic a controlled environment that encourages rapid germination and robust development. This involves meticulous attention to light exposure, consistent watering, and the maintenance of appropriate humidity levels.
Looking for the best kits to grow nutrient-packed microgreens at home? It’s a rewarding hobby, and surprisingly easy. While the recent political climate, like the protests surrounding the Trump inauguration in the Bay Area , might feel overwhelming, these kits provide a peaceful and productive alternative. Focusing on fresh, healthy ingredients for your meals is a great way to connect with nature and improve your well-being.
This ensures that the microgreens are provided with the exact environment they need for thriving growth.
Light and Duration
Microgreens, unlike mature plants, require specific light conditions for optimal growth. Different varieties have varying light needs. For instance, some species, like radish, respond well to bright, indirect light, while others, like peas, may need slightly more intense light to achieve optimal color and texture. The duration of light exposure also plays a vital role. Generally, microgreens benefit from 12-16 hours of light per day.
Adjusting the light source’s intensity and duration based on the specific microgreen variety and the stage of growth can significantly impact yield and quality. Too little light can result in pale, spindly growth, while excessive light can lead to scorching and uneven development.
Watering and Nutrient Management
Consistent moisture is essential for microgreens to thrive. Watering should be done gently, ideally from the bottom to avoid disturbing the delicate roots. Overwatering can lead to root rot, while underwatering can stunt growth and lead to wilting. A fine mist or spray can be used in some cases. The use of nutrient solutions is also crucial, and the appropriate concentration must be followed meticulously.
Overuse of nutrients can hinder growth, whereas inadequate nutrient provision will also negatively impact the yield. Using a well-balanced nutrient solution, specifically formulated for microgreens, is recommended to ensure optimal nutrition and prevent nutrient deficiencies or excesses.
Humidity Levels
Maintaining appropriate humidity levels is vital for the success of microgreen cultivation. High humidity is essential for maintaining the moisture content of the growing medium and preventing the rapid drying out of the delicate seedlings. Excessive dryness can cause the microgreens to wilt and reduce their nutritional value. Using a humidifier or covering the growing area with a clear plastic sheet can be beneficial in some cases to increase humidity.
A balance is needed, as excessive humidity can lead to fungal diseases or pest infestations.
Troubleshooting Common Growing Issues
Microgreen cultivation, like any growing process, is prone to challenges. Understanding and addressing these issues promptly can prevent significant setbacks.
| Issue | Cause | Solution |
|---|---|---|
| Yellowing leaves | Nutrient deficiency, overwatering, or underwatering | Adjust nutrient solution, adjust watering schedule, or check the drainage system. |
| Spindly growth | Insufficient light | Increase light intensity or duration. |
| Pests (e.g., aphids) | High humidity, poor sanitation | Improve air circulation, reduce humidity, and use appropriate pest control methods. |
| Fungal diseases | Excessive humidity, poor drainage | Improve air circulation, reduce humidity, and ensure proper drainage. |
| Wilting | Underwatering, improper light exposure, excessive temperature | Adjust watering schedule, ensure proper light exposure, and maintain optimal temperature. |
Harvesting and Using Microgreens
Microgreens, those vibrant bursts of nutrition, are ready to be enjoyed once they reach their peak. Knowing when and how to harvest them ensures you get the most flavor and nutrients. Proper harvesting and storage methods preserve their freshness, allowing you to incorporate them into a variety of delicious dishes.Harvesting microgreens at their optimal stage maximizes flavor and nutritional value.
The ideal time for harvesting is when the leaves are fully developed but before they begin to bolt (flower). At this stage, the microgreens have reached their peak nutritional content and are at their most tender.
Ideal Time for Harvesting
Microgreens are typically ready for harvest when they reach a height of 2-4 inches, depending on the variety. They should exhibit vibrant color and firm, healthy leaves. Waiting too long can result in tough, less flavorful greens. Conversely, harvesting too early means missing out on the optimal nutritional profile and flavor.
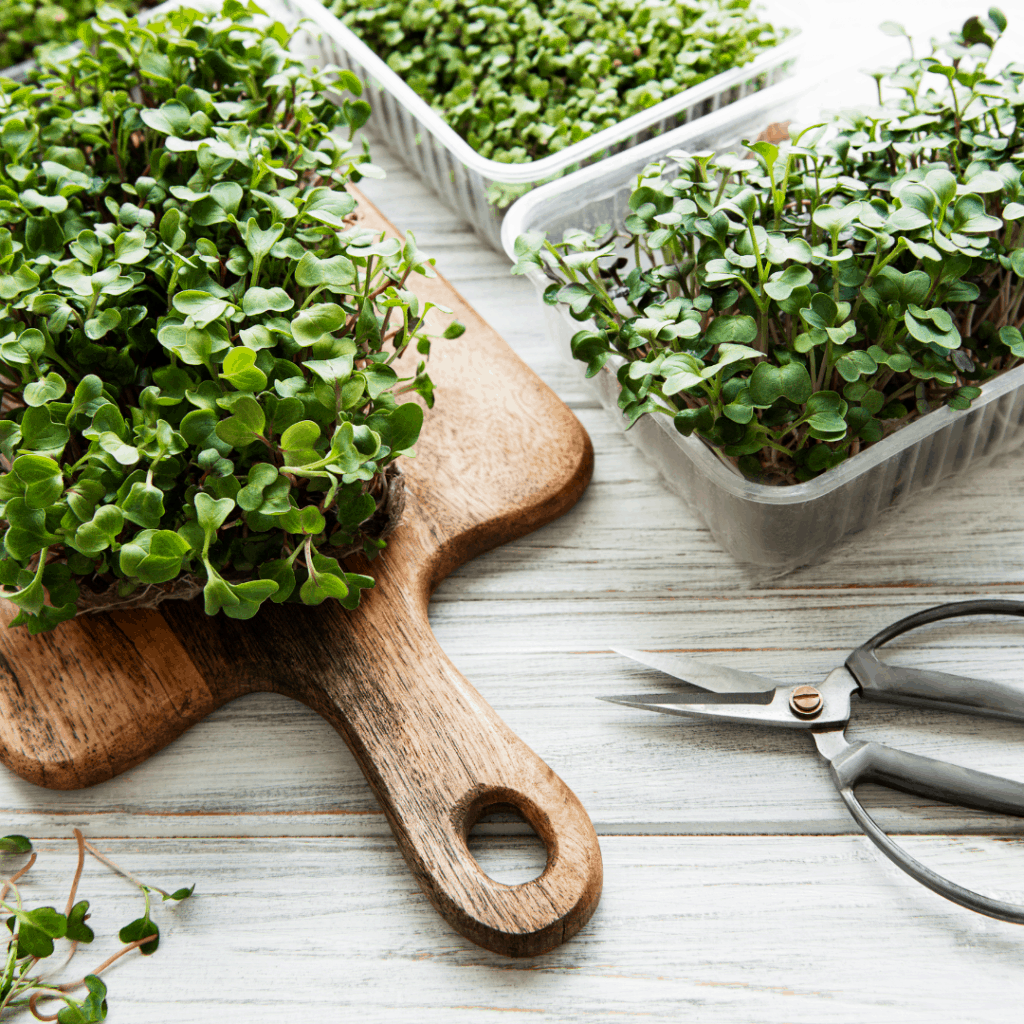
Harvesting Techniques
Carefully harvest microgreens to avoid damaging the plant. Using clean, sharp scissors or a knife is ideal. Cut the microgreens close to the soil, ensuring you don’t pull or tear the stems. Avoid damaging the surrounding seedlings. If you intend to re-grow the plant, gently cut just above the soil line.
Storing Harvested Microgreens
Maintaining freshness is key to maximizing the enjoyment of your harvested microgreens. Store them in an airtight container in the refrigerator. Place a damp paper towel inside the container to maintain moisture. This method helps keep the greens crisp and prevents them from drying out. Storing microgreens in the refrigerator will help them stay fresh for 3-5 days.
Incorporating Microgreens into Meals
Microgreens are incredibly versatile and can be added to a wide array of dishes. Their subtle flavor and vibrant color add a touch of freshness and visual appeal to salads, sandwiches, and more. They can be sprinkled atop soups, stews, or used as a garnish. Microgreens are also a great addition to smoothies, providing a burst of nutrients and flavor.
Microgreen Recipes
| Recipe | Ingredients | Preparation |
|---|---|---|
| Spring Salad with Lemon Vinaigrette | Mixed greens, cherry tomatoes, cucumber, microgreens, lemon juice, olive oil, salt, pepper. | Combine all ingredients in a bowl and toss gently. |
| Spicy Asian Noodle Bowl | Rice noodles, shredded carrots, edamame, microgreens, soy sauce, sesame oil, chili garlic sauce. | Cook noodles, combine with other ingredients, and top with microgreens. |
| Avocado Toast with Microgreens | Whole-wheat toast, mashed avocado, microgreens, red pepper flakes, salt, pepper. | Toast bread, spread avocado, sprinkle with microgreens and seasonings. |
Different Varieties and Nutritional Value: The Best Kits For Growing Nutrient Packed Microgreens At Home
Microgreens, those tiny but mighty sprouts, pack a surprising punch of nutrients. Beyond their vibrant colors and appealing textures, they offer a wide array of nutritional benefits, making them a valuable addition to any healthy diet. Exploring the diverse varieties available and understanding their unique nutritional profiles allows you to choose the perfect microgreens to complement your culinary creations and boost your overall well-being.
Available Microgreen Types
A plethora of microgreens are readily available for home growing. From the familiar to the more exotic, each variety boasts its own distinct characteristics and nutritional value. Popular choices include alfalfa, broccoli, radish, and sunflower, among others. Discovering the potential of these diverse options will broaden your culinary horizons and unlock a world of flavorful and nutritious possibilities.
- Alfalfa: Known for its mild flavor and nutritional density, alfalfa microgreens are a classic choice. Their vibrant green hue adds a touch of freshness to salads and other dishes.
- Broccoli: Broccoli microgreens offer a peppery taste and a significant boost of vitamins and minerals, making them a healthy and delicious addition to your diet. Their deep green color makes them an appealing visual element in any meal.
- Radish: Radish microgreens are renowned for their peppery flavor and vibrant red color. Their sharp flavor profile elevates salads and sandwiches.
- Sunflower: Sunflower microgreens boast a delicate nutty flavor and provide a significant dose of vitamins and minerals. Their golden hue adds a touch of elegance to dishes.
- Mustard: Mustard microgreens offer a bold and spicy flavor profile. Their unique taste is ideal for adding a kick to various dishes.
Nutritional Profiles of Different Microgreens
Each microgreen variety possesses a unique nutritional profile, reflecting the specific nutrients derived from its parent plant. Understanding these differences allows you to choose the best microgreens for your specific nutritional needs and culinary preferences.
- Alfalfa microgreens are a good source of protein, vitamin K, and vitamin C. They also contain significant amounts of iron, calcium, and potassium. This makes them a great addition to a diet focused on providing the body with a wide range of nutrients.
- Broccoli microgreens are exceptionally rich in vitamins, particularly vitamins C and K. They also provide a significant amount of folate, a crucial B vitamin. Their nutritional profile is particularly advantageous for individuals seeking a significant intake of vitamins.
- Radish microgreens are an excellent source of vitamin C, folate, and potassium. Their unique flavor and nutritional profile make them a valuable addition to a diverse diet.
- Sunflower microgreens offer a diverse array of vitamins and minerals, including vitamin E, magnesium, and potassium. Their unique nutritional profile makes them a valuable addition to a balanced diet.
- Mustard microgreens are a fantastic source of vitamin A, vitamin C, and vitamin K. They also provide minerals like calcium, potassium, and iron. Their nutritional profile offers a substantial contribution to a healthy diet.
Nutritional Value Comparison
Comparing the nutritional value of different microgreens helps in selecting the best options to meet specific dietary requirements. Factors such as vitamin and mineral content vary significantly between different types.
| Microgreen type | Vitamins | Minerals |
|---|---|---|
| Alfalfa | Vitamin K, Vitamin C, Vitamin A | Iron, Calcium, Potassium |
| Broccoli | Vitamin C, Vitamin K, Folate | Potassium, Manganese, Calcium |
| Radish | Vitamin C, Folate, Vitamin A | Potassium, Calcium, Magnesium |
| Sunflower | Vitamin E, Vitamin K, Vitamin A | Magnesium, Potassium, Iron |
| Mustard | Vitamin A, Vitamin C, Vitamin K | Calcium, Potassium, Iron |
Ideal Growing Conditions for Specific Types
Different microgreens have specific environmental requirements for optimal growth. Understanding these needs ensures healthy and vigorous growth. This includes factors like temperature, humidity, and light exposure.
- Alfalfa: Alfalfa thrives in cooler temperatures, typically between 60-70°F. They require consistent moisture and bright, indirect light.
- Broccoli: Broccoli microgreens prefer slightly warmer temperatures, ideally between 70-80°F. They require ample light and consistent moisture.
- Radish: Radish microgreens grow best in cooler temperatures, similar to alfalfa, and require consistent moisture and bright, indirect light.
- Sunflower: Sunflower microgreens are relatively adaptable and can thrive in a range of temperatures. They require ample light and consistent moisture.
- Mustard: Mustard microgreens are relatively tolerant of varying temperatures. They require consistent moisture and ample light.
Epilogue

In conclusion, cultivating microgreens at home is a rewarding experience that allows you to control the quality and freshness of your food. Choosing the right kit, understanding the nuances of growth, and maintaining optimal conditions will pave the way for a bountiful harvest of nutrient-packed microgreens. Whether you’re a seasoned gardener or a beginner, this guide provides the essential knowledge and practical tips to embark on this exciting journey.