
Delete screenshots in Google Photos is a common need for many users. Whether it’s personal photos, professional documents, or social media captures, knowing how to efficiently and safely delete screenshots is crucial. This guide will walk you through various methods, alternative solutions, and troubleshooting steps to manage your Google Photos screenshot collection effectively.
From simple single-screenshot deletions to bulk actions and advanced search techniques, this guide covers all the bases. We’ll explore different scenarios where you might want to remove screenshots and discuss the pros and cons of each approach, including potential pitfalls to avoid. We’ll also delve into the importance of security and data recovery.
Understanding the User’s Need
Deleting screenshots from Google Photos is a common digital housekeeping task. Users often find themselves overwhelmed by the sheer volume of captured moments, and the need to declutter their digital space. This desire for organization extends beyond mere aesthetics, encompassing practical concerns about storage space and privacy. Understanding the motivations behind this desire to delete is crucial for developing effective tools and solutions.Screenshots, while seemingly innocuous records of digital activity, can contain sensitive information.
The desire to remove them stems from a variety of factors, often influenced by personal values and the nature of the captured content. A comprehensive understanding of these motivations allows for the development of user-friendly tools that cater to a diverse range of needs.
Common Reasons for Deleting Screenshots
Users frequently delete screenshots due to concerns about privacy and security. They may contain sensitive personal information, passwords, or other confidential data. The desire for a clean digital footprint, free from potentially embarrassing or irrelevant content, is another significant driver. Some users are motivated by a desire to declutter their photo library, making it easier to navigate and find important images.
Cleaning up those pesky screenshots in Google Photos? It’s a common task, especially after a big game like the Cal vs. Stanford Bay Area women’s college basketball matchup featuring Charmin Smith and Kate Paye. This exciting game probably generated a bunch of screengrabs. Thankfully, deleting them is straightforward, just a few clicks away.
So, get those digital memories organized and ready for the next game!
Examples of Situations Requiring Screenshot Deletion, Delete screenshots in google photos
Screenshots of sensitive information, like bank account details or personal documents, are prime candidates for deletion. Screenshots of passwords or login credentials, if not stored securely elsewhere, pose a significant security risk and warrant removal. Screenshots of private conversations, if no longer relevant or desired, can be deleted to maintain privacy. Ephemeral screenshots, like those of temporary information, are often deleted once the information is no longer needed.
Emotional and Psychological Factors
The act of deleting screenshots can be tied to emotional considerations. Some users might feel overwhelmed by the sheer volume of digital content and seek to simplify their digital lives. For others, screenshots might trigger negative emotions or reminders of past experiences. The psychological weight of unwanted or embarrassing images can drive the desire for their removal.
In some cases, the deletion of screenshots is a form of emotional purging, a way of confronting and moving on from specific situations.
Types of Screenshots and Deletion Reasons
| Screenshot Type | Reasons for Deletion |
|---|---|
| Personal | Embarrassing moments, outdated information, sensitive personal details, duplicate images, unwanted reminders. |
| Professional | Confidential data, outdated project information, sensitive client details, information that’s no longer relevant to current work. |
| Social | Irrelevant or outdated conversations, screenshots of heated arguments, private messages, duplicate content, potentially embarrassing or offensive content. |
Methods for Deleting Screenshots
Deleting screenshots in Google Photos is a straightforward process, but understanding the different methods can save you time and ensure you’re not accidentally deleting important files. Knowing how to delete screenshots efficiently, especially in bulk, is crucial for maintaining a clean and organized photo library.Efficient screenshot management is key to maintaining a well-organized Google Photos library. Different methods exist, allowing you to delete individual screenshots or multiple ones simultaneously.
This section details the available methods and their associated advantages and drawbacks.
Cleaning out old screenshots in Google Photos? It’s a surprisingly tedious task, but sometimes necessary. Speaking of things that can be emotionally draining, did you know that the Super Bowl can actually strain your cardiovascular system? Recent studies suggest that the intense pressure and excitement of the big game can be hard on the heart, as highlighted in this article on the topic is your heart in the game doctors says the super bowl can break it.
So, maybe take a break from deleting those screenshots and focus on your well-being instead! After all, a healthy heart is more important than any digital memory.
Direct Deletion of Individual Screenshots
This method allows for the removal of single screenshots. Simply locate the screenshot within your Google Photos library. Clicking on the screenshot will open it. A three-dot menu will appear; selecting “Delete” will remove the image. This method is ideal for deleting a single unwanted image quickly.
Bulk Deletion of Screenshots
Deleting multiple screenshots simultaneously is more efficient than deleting them one by one. Google Photos provides several ways to achieve this.
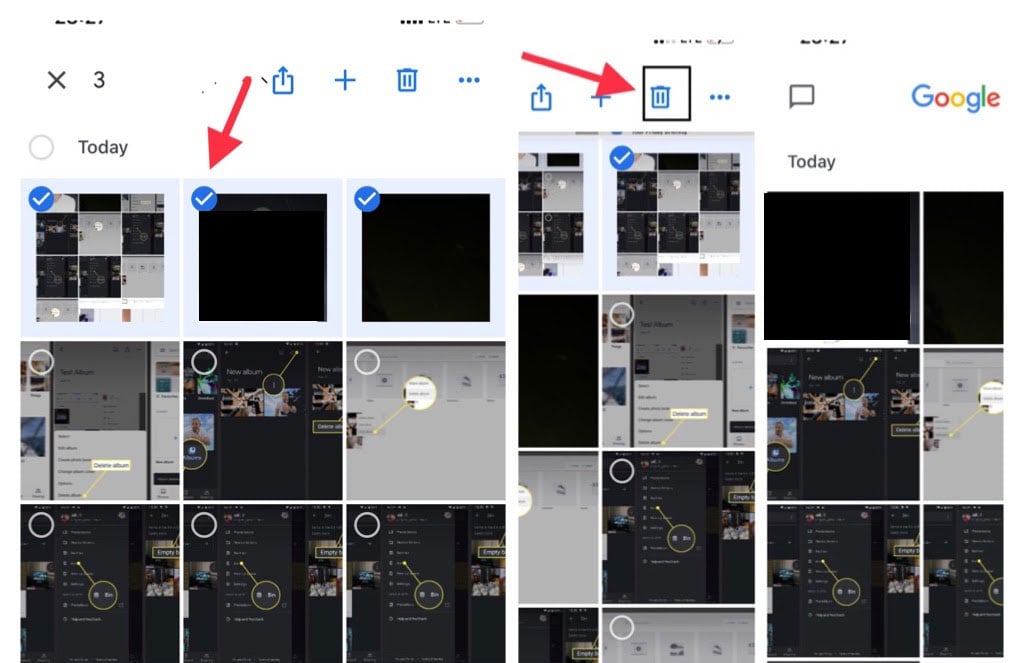
Using Selection Tools
Google Photos offers selection tools for bulk deletion, making the process considerably faster. Checkboxes appear next to each thumbnail when viewing multiple screenshots. Selecting the checkboxes allows you to choose the screenshots you want to remove, and a “Delete” button will be available. Alternatively, dragging and dropping screenshots to a separate area or folder within the Photos interface is another approach.
This method enables a more visual approach to choosing which images to remove. The use of drag-and-drop provides a convenient way to remove unwanted images from a larger collection.
Potential Issues During Screenshot Deletion
While deleting screenshots is generally straightforward, potential issues might arise. Network connectivity problems can lead to delays or failure during the deletion process. If the internet connection is unstable or slow, the deletion process may not complete successfully. Furthermore, unexpected errors might occur due to factors beyond your control. Additionally, issues may arise if you’re using a third-party app to access Google Photos.
Comparison of Screenshot Deletion Methods
| Deletion Method | Pros | Cons |
|---|---|---|
| Direct Deletion (Individual) | Simple, quick for single images. | Inefficient for multiple screenshots. |
| Bulk Deletion (Selection Tools) | Efficient for multiple images, visual selection. | May require more steps compared to direct deletion. |
| Bulk Deletion (Drag-and-Drop) | Visual, intuitive for selection; can be faster for larger groups. | Might not be as accessible to all users. |
Alternative Solutions and Workarounds
Tired of Google Photos’ screenshot management? Fear not, fellow digital nomads! This section explores alternative cloud storage options, clever folder organization techniques, and powerful search methods to reclaim control over your screenshot hoard. We’ll equip you with the tools to efficiently manage these often-overlooked digital assets.Beyond Google Photos, other cloud storage solutions offer unique advantages for managing screenshots.
Different services cater to various needs, from simple file storage to enhanced features like advanced search and organization. This exploration of alternatives provides valuable options beyond Google Photos.
Alternative Cloud Storage Options
Various cloud storage providers offer robust features for managing files, including screenshots. Some providers prioritize simplicity, while others focus on advanced search and organization capabilities. Researching and comparing different providers helps you select the service best suited to your needs.
- Dropbox: Known for its simple file-sharing and syncing features, Dropbox can be a straightforward solution for storing screenshots. Its user-friendly interface and robust file management tools are attractive for users who value ease of access and quick sharing.
- OneDrive: Microsoft’s OneDrive integrates seamlessly with other Microsoft products, making it a valuable option for users already integrated into the Microsoft ecosystem. OneDrive’s strong search capabilities and file organization tools are useful for locating specific screenshots.
- Mega: Mega provides a robust platform for storing large files, including screenshots, with a focus on privacy. Its security features and generous storage plans make it a strong contender for users prioritizing privacy and security.
Moving Screenshots to a Different Folder
Transferring screenshots to a dedicated folder within Google Photos improves organization and allows for better control over your digital assets. This method simplifies the process of managing and locating screenshots, ultimately saving you time.
Cleaning up my Google Photos folder has been a bit of a chore lately. Deleting screenshots is always a pain, but lately I’ve been trying to find ways to declutter, especially since I’m so swamped with news like the Biden administration’s recent deal with the Taliban, biden americans held taliban elusive deal. It’s a real headache figuring out which screenshots to keep, but hopefully, these tips will help me streamline the process.
I’m still trying to find the perfect way to manage those unwanted screenshots!
- Open Google Photos and navigate to the folder containing the screenshots.
- Select the screenshots you want to move.
- Click on the “More” option (represented by three vertical dots). Choose “Move to.”
- Select the desired folder in Google Photos where you want to place the screenshots.
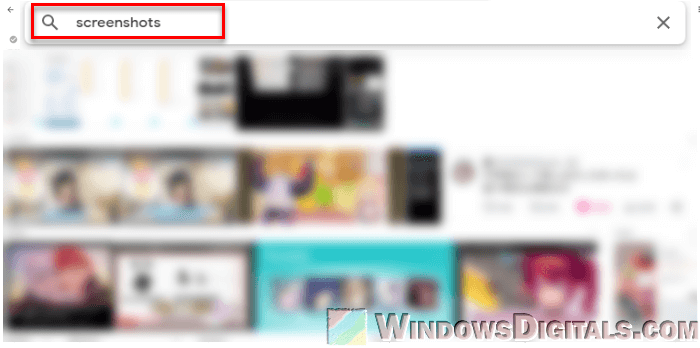
Using Search Filters and Sorting
Leveraging Google Photos’ search filters and sorting options streamlines the process of locating specific screenshots. By utilizing these features, you can quickly identify the desired images.
- Use s: Include relevant s like “screenshot,” “meeting,” or “presentation” to refine your search results.
- Date range: Specify the date range of the screenshots you’re searching for. This is helpful when you need to find images taken within a specific time period.
- Sorting options: Sort screenshots by date, name, or file size for easier organization and identification.
Organizing Screenshots in Google Photos
Effective organization is crucial for managing large numbers of screenshots. This method ensures efficient retrieval of specific images.
- Create folders: Create dedicated folders for different categories of screenshots, such as “work,” “personal,” or “travel.”
- Use labels: Apply labels to screenshots to group them by project, meeting, or other relevant criteria.
- Rename files: Rename screenshots with descriptive names for better identification.
Alternative Storage Solutions
The following table provides a comparison of alternative cloud storage options. This table helps users evaluate the features and capabilities of different storage solutions.
| Storage Solution | Features |
|---|---|
| Dropbox | Simple file sharing, syncing, user-friendly interface |
| OneDrive | Seamless integration with Microsoft products, strong search capabilities |
| Mega | Robust platform for large files, strong privacy focus |
Troubleshooting and Error Handling
Deleting screenshots in Google Photos, while usually straightforward, can sometimes encounter hiccups. Understanding potential errors and their resolutions can save you time and frustration. This section details common problems, their causes, and how to overcome them.Troubleshooting involves identifying the source of the issue and applying appropriate solutions. Errors can stem from various factors, including temporary network problems, Google Photos server issues, or even user-related mistakes.
A systematic approach to troubleshooting is essential to efficiently resolve these problems.
Potential Error Messages
Google Photos may display specific error messages to indicate the problem. These messages, while not always explicit, often provide clues about the nature of the failure. For example, “Network error” suggests an interruption in the connection between your device and the Google Photos servers. Understanding these messages can significantly narrow down the possibilities.
Resolving Deletion Failures
Several reasons can lead to failed screenshot deletions. A temporary network outage, for example, might prevent the deletion request from reaching the Google Photos servers. In such cases, retrying the deletion after a short period often resolves the issue. If the problem persists, checking your internet connection and ensuring a stable Wi-Fi or mobile data connection can be helpful.
If the problem is recurring, checking for Google Photos service outages on dedicated status pages can help.
Unexpected Behavior During Deletion
Sometimes, Google Photos might exhibit unexpected behavior during the deletion process. This could manifest as the deletion process freezing, the app crashing, or the screenshots not being removed from the designated album. Restarting the Google Photos app or your device, and then attempting the deletion again can be a solution. Ensuring sufficient storage space on your device can also help avoid such issues.
Recovering Accidentally Deleted Screenshots
Google Photos, like many cloud services, does not provide a simple “undelete” function. However, if the deletion is recent, the deleted items might still be recoverable. Checking the “Trash” or “Bin” folder within Google Photos might reveal the missing screenshots. Furthermore, checking recent backups or external storage where you may have previously saved the screenshots can be helpful.
Screenshots That Cannot Be Deleted
Some screenshots might prove impossible to delete. This could be due to the screenshots being linked to other features within Google Photos, like albums or shared collections. If a screenshot is linked to other content, you may need to remove the associated items first. Also, the screenshots might be associated with a shared folder or shared album that you don’t have the correct permissions to delete from.
Table of Common Errors and Solutions
| Error Message | Possible Solution |
|---|---|
| Network error | Check internet connection, retry later, ensure a stable Wi-Fi or mobile data connection. |
| Deletion process frozen | Restart the Google Photos app or device. |
| Screenshots not deleted | Ensure the screenshots are not linked to other features or shared albums. |
| Screenshot cannot be found in the trash | Check recent backups, external storage where you may have previously saved the screenshots. |
Advanced Techniques and Customization
Mastering Google Photos screenshot management extends beyond basic deletion. Advanced techniques allow for precise control over your image collection, enabling you to organize, export, and recover deleted screenshots with ease. This section dives into these powerful features, offering actionable steps to optimize your photo management.
Advanced Search Options for Screenshot Deletion
Google Photos’ search functionality goes beyond simple s. Leveraging advanced search operators allows for precise targeting of screenshots. Using these operators, you can narrow down your search results, focusing on specific screenshots for deletion. This avoids accidentally deleting unrelated images.
- Date Range: Specify a date range to isolate screenshots taken within a particular period. This is particularly helpful when dealing with a large number of screenshots and knowing the date of their creation. For example, to delete screenshots from the past month, use the “Date Taken” filter and select the appropriate date range.
- File Type: Filter by “Screenshot” to isolate images specifically captured as screenshots. This eliminates the need to manually sift through all images to find the target screenshots.
- s: Incorporate s associated with the screenshots, like the name of a meeting or the date, for precise targeting. If you have a meeting name in the screenshot title or metadata, this is a highly effective approach. For example, searching for “Meeting with John” will display only relevant screenshots.
Custom Albums for Organized Screenshot Management
Custom albums provide a structured approach to organizing screenshots. Creating custom albums allows for compartmentalization, simplifying the process of deleting screenshots within specific contexts.
- Creating a Custom Album: Navigate to the Google Photos interface. Click the “+” icon to create a new album. Name the album appropriately, like “Work Screenshots” or “Personal Screenshots.”
- Adding Screenshots to the Album: Select the screenshots you want to add to the album. Click on the three vertical dots next to the images and select “Add to Album”. Choose the pre-created album from the list.
- Deleting Screenshots from the Album: Select all screenshots within the custom album you wish to delete. Click the trash icon to permanently delete the selected screenshots. This ensures that you are only deleting screenshots from the specified album.
Exporting Screenshots from Google Photos
Exporting screenshots allows for downloading and managing them offline. This feature provides flexibility for backing up or archiving screenshots in a different format.
- Select Screenshots: Choose the screenshots you want to export. Select them individually or select all images using the checkboxes.
- Download Options: Click the download icon (three dots) and select “Download.” Google Photos will present different options for download, like individual image downloads or bulk downloads.
- Saving Downloaded Screenshots: Save the downloaded screenshots to your desired location on your device. Choose a suitable folder for storage and organization.
Restoring Deleted Screenshots from the Trash
Google Photos provides a trash bin for accidentally deleted screenshots. Restoring deleted screenshots from the trash is straightforward.
- Accessing the Trash: Open the Google Photos app and navigate to the “Trash” section. This will show all recently deleted items.
- Selecting Screenshots for Restoration: Select the screenshots you want to restore. Choose them individually or select all images to be restored.
- Restoring the Selected Screenshots: Click the “Restore” button. This will reinstate the selected screenshots to their original location within your Google Photos library.
Security Considerations: Delete Screenshots In Google Photos
Deleting screenshots, while seemingly innocuous, can have significant implications for privacy and data security. Careless deletion practices can lead to the loss of crucial evidence or compromise sensitive information. Understanding the potential risks and implementing secure deletion methods is paramount.Careful consideration of the content within screenshots is crucial before deletion. Screenshots might contain personally identifiable information (PII), confidential business data, or evidence related to legal proceedings.
Deleting these screenshots without proper safeguards can have far-reaching consequences.
Implications of Deleting Screenshots on Privacy and Data Security
Deleting screenshots can compromise privacy if they contain sensitive information like personal addresses, financial details, or confidential communications. The loss of evidence can also affect legal proceedings, hinder investigations, or damage reputation. Moreover, accidentally deleting crucial evidence could impact legal cases or business dealings.
Secure Deletion Procedures for Screenshots
Implementing secure deletion procedures is critical to prevent data breaches and ensure compliance with data privacy regulations. A comprehensive approach involves multiple steps. First, thoroughly review the screenshots for sensitive data. Second, implement a phased deletion process, beginning with a review, followed by a scheduled deletion, and then finally a verification step to ensure nothing remains. This approach minimizes the risk of accidental data loss.
Data Loss or Corruption During Deletion
Data loss or corruption during the deletion process can occur if the deletion isn’t handled correctly. For instance, if the file system or storage device is faulty, or the deletion process is interrupted, crucial data could be lost. Using built-in tools and properly configuring deletion parameters can mitigate this risk. It’s also important to ensure the storage device is functioning properly before initiating a bulk deletion.
Comparison of Security Practices for Managing Sensitive Information in Screenshots
Several security practices can be employed to manage sensitive information in screenshots. These include data masking, encryption, and access controls. Data masking obscures sensitive data within screenshots. Encryption renders the content unreadable without a decryption key. Access controls restrict access to screenshots based on user roles or permissions.
Each method has its own advantages and disadvantages, and the best approach depends on the specific context.
Importance of Backups in Case of Accidental Deletion
Regular backups of screenshots, particularly those containing sensitive information, are crucial for mitigating the risk of accidental deletion. Backups provide a safety net, allowing for the recovery of lost data. Cloud storage or external hard drives are suitable backup options. Regular, automated backups are recommended for maintaining data integrity and accessibility.
Ending Remarks
In conclusion, deleting screenshots in Google Photos can be handled with various methods and considerations. Whether you need to remove individual or multiple screenshots, understanding the available tools and options is key. This comprehensive guide has provided a clear path for effectively managing your Google Photos screenshot collection, from simple deletions to advanced organizational techniques and security best practices.
Remember to prioritize backups and be mindful of potential data loss. Happy organizing!